MSVC Crossplatform Development Part 7
.NET framework assembly In this part, we will create a .NET framework library. This library can be used from within a WPF application. It will only work on Windows, but so do WPF applications.
As always, start with adding a new project to the Libraries folder and this time call the project DemoTools.NET.Framework.
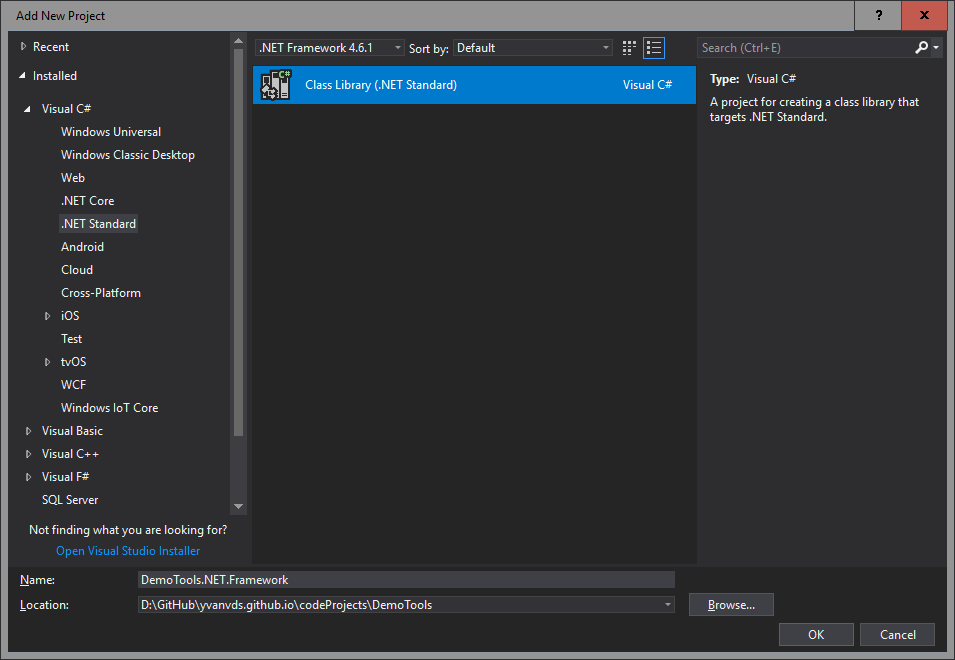
Project Settings
With C# projects we don’t have to change as much of the project settings compared to C++.
- In the MSVC top menu, open
Project -> Project Dependenciesand checkGenerate.NET. This will ensure that Swig will generate all files before we build. - Right Click Dependencies in the Project Explorer and add a reference to
NetDemoTools. - Open the project properties and set the Assembly Name to
DemoToolsNET. This will generate the managed dll asDemoToolsNET.dll. - Delete
Class1.csfrom the project.
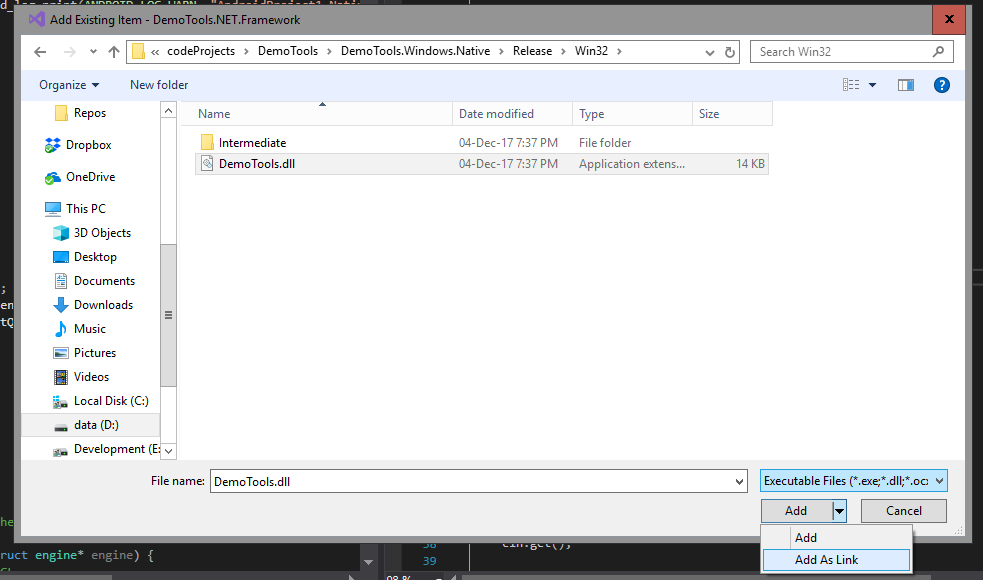
Now we need to add the native DLL to this project. We can’t use different DLL’s for different builds, so we’ll use the x86 release version. I’ve noticed that there are quite a few conditions for this to work:
- Add the
DemoTools.dllas a link, not as a copy.
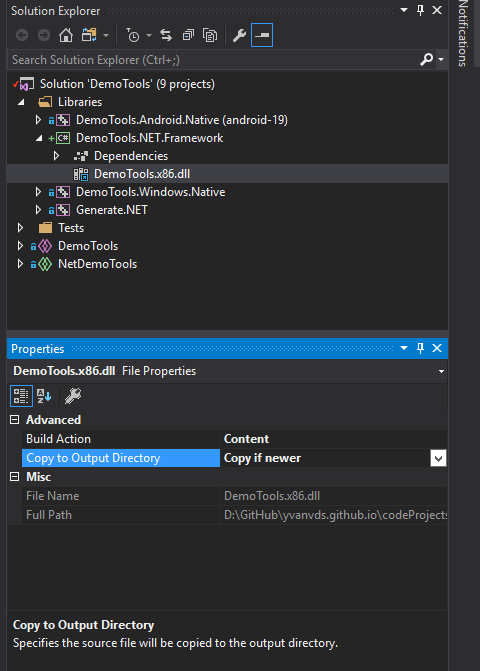
- Don’t put the link in a subfolder like
lib. It won’t work. - Make sure the managed dll is the same as the name used with Swig. (We made sure of that by renaming the assembly.)
- Make sure the native dll name is different from the assembly dll name. In this case there isn’t any conflict because we used
DemoTools.dllandDemoToolsNET.dll. - If your native dll depends on other dll’s, add them too. If you don’t, and try to build an application later on, you will get an error telling you the dll cannot be found. This is confusing, because it shows the name of the primary dll as the one that is not found, even though it is present. While in fact the secondary dependancy of that dll is the culprit.
Open the file properties of the link to DemoTools.dll and set:
- Build Action:
Content - Copy to Output Directory:
Copy if Newer
Compile
In the top menu, select
Build -> Batch Build
Select all configurations belonging to this project and build.
Leave a Comment