MSVC Crossplatform Development Part 3
C++ Application So far, we got a Shared Items Project and a Windows DLL. In this part a console application will be added. This application offers the most direct way to test our library. (Well, Unit Tests aside that is. I do not want to go into unit tests in this series.)
Right-click the Tests folder we’ve created earlier and choose:
Add -> New Project -> Visual C++ -> Windows Desktop -> Windows Console Application
Project Properties
Name this project NativeWindowsApp and add a reference to the DLL project DemoTools.Windows.Native. Open the project properties and:
- Configuration Properties (All platforms and configurations)
- Output Directory:
$(ProjectDir)\$(Configuration)\ - Intermediate Directory:
$(ProjectDir)\$(Configuration)\Intermediate\
- Output Directory:
- In C/C++ => General (All platforms and configurations)
- Additional Include Directories:
..\DemoTools;
- Additional Include Directories:
- In C/C++ => Preprocessor (All platforms and configurations)
- Preprocessor Definitions: add
_IMPORTDEMOTOOLS;
- Preprocessor Definitions: add
- In Linker => General (Different Values)
- Additional Library Directories:
..\DemoTools.Windows.Native\Debug\Win32; - Additional Library Directories:
..\DemoTools.Windows.Native\Debug\x64; - Additional Library Directories:
..\DemoTools.Windows.Native\Release\Win32; - Additional Library Directories:
..\DemoTools.Windows.Native\Release\x64;
- Additional Library Directories:
- In Linker => Input (All platforms and configurations)
- Additional Dependencies:
Demotools.lib
- Additional Dependencies:
The extra preprocessor definition is not really needed. It translates the macro API (used on class and function declarations) into __declspec (dllimport). Look in Preprocessor.h if you don’t know what I am talking about. Importing dll classes is not needed, but Microsoft recommends you do it anyway, because your code will be more optimized.
We also need to copy the DLL to the application output directory. Do this in the DLL project we’ve made before, by adding a custom build step to the properties.
Open Properties -> Build Events -> Post-Build Event and add this as Command Line. (Remember to use the correct name for every platform!)
copy /Y "$(ProjectDir)$(Configuration)\$(Platform)\DemoTools.dll" "..\NativeWindowsApp\$(Configuration)"The previous command will copy the dll to the folder from which the console application will run. If you make changes to the classes in the shared project, the DLL will be compiled again and the file will be copied over anew. I recommend this approach for every output file you need somewhere. If you don’t, you’re gonna forget to do it manually sooner or later, and you’ll end up wondering why your code changes are not reflected in the application.
Project Code
Add the following code to the test application.
main.cpp
#include "stdafx.h"
#include "Counter.h"
#include "PlatformID.h"
#include <iostream>

using namespace std;
using namespace DemoTools;

int main()
{
	cout << "DemoTools output: " << endl;

	// check the platform
	PlatformID ID;
	cout << ID.Get() << endl;
	cout << endl;

	// check the main counter
	MainCounter() = MainCounter() + 10;
	cout << "This should be 10: " << MainCounter().Get() << endl;

	// add a new counter
	Counter c;
	c = c + 5;
	cout << "This should be 5: " << c.Get() << endl;

	// merge counters
	MainCounter() = MainCounter() + c;
	cout << "This should be 15: " << MainCounter().Get() << endl;

	// reset counter
	MainCounter().Reset();
	cout << "This should be 0: " << MainCounter().Get() << endl;

	cin.get();

	return 0;
}
Compile and Run
Because we did not change the DLL project code but added a custom build step, we’re gonna start with rebuilding the DLL. Go to Build -> Batch Build and choose Rebuild.
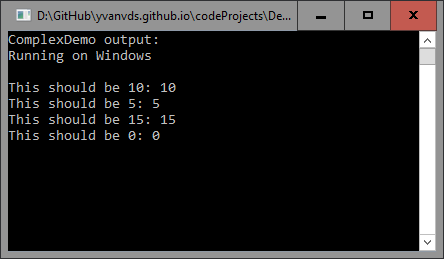
Check your filesystem to verify that all DLL’s have been copied to the project directories. Afterwards, run the console application. The output should be like this:
Leave a Comment