MSVC Crossplatform Development Part 2
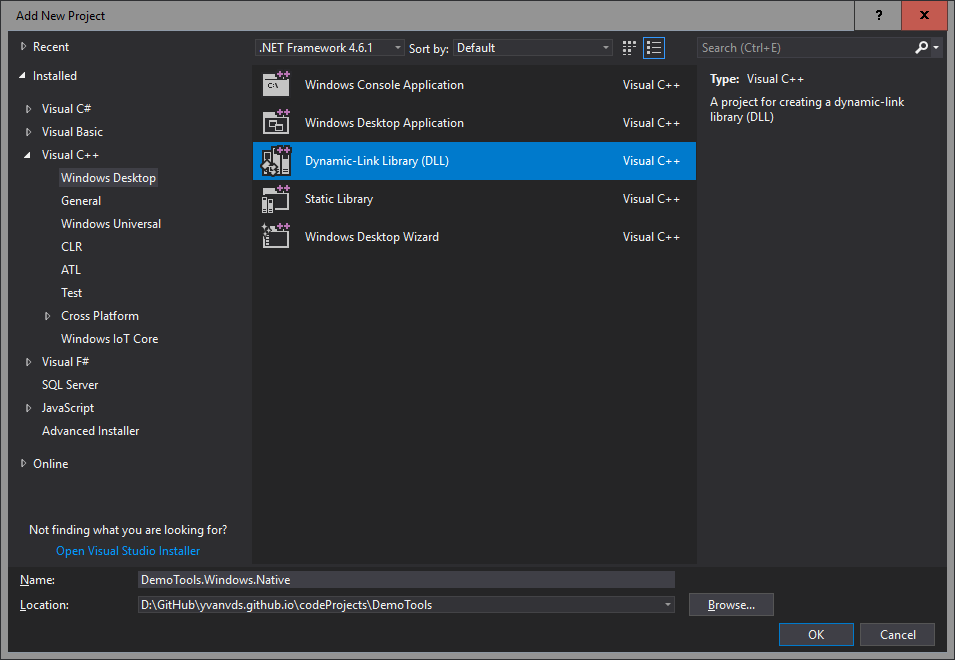
C++ Windows DLL We’ve got a Shared Items Project ready, but no actual library has been built so far. In this part we will add a Windows DLL in native C++. In the Solution Explorer, Right-click the Libraries folder we’ve created earlier and choose:
Add -> New Project -> Visual C++ -> Windows Desktop -> Dynamic-Link Library
This library should be called DemoTools.Windows.Native.
First, we’re gonna add the Shared Project by right-clicking on the project References:
Add Reference -> Shared Project -> DemoTools
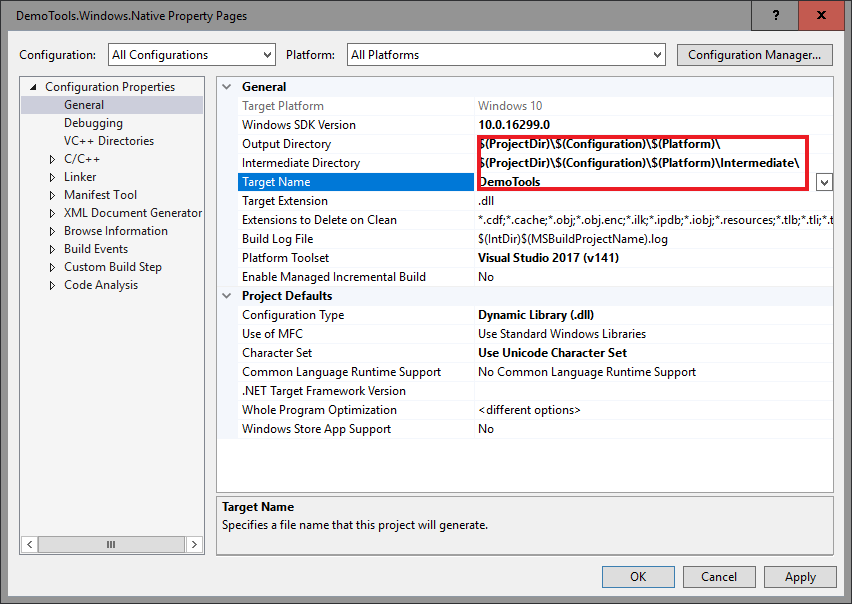
Project Properties
The standard output directories for a project point to the Solution level. While that has its uses, I don’t see any advantages to this when working with crossplatform code. We will redirect the generated files to the Project Directory.
Project Properties -> Configuration Properties -> General
First select All Configurations and All Platforms. Change
- Output Directory:
$(ProjectDir)\$(Configuration)\$(Platform)\ - Intermediate Directory:
$(ProjectDir)\$(Configuration)\$(Platform)\Intermediate\
Next, set the Target Name to DemoTools
We will also turn off Precompiled Headers because our shared project does not need them. In a real-life library, you probably don’t want to do this. To do this, select All Configurations and All Platforms again. Go to:
Configuration Properties -> C/C++ -> Precompiled Headers
And set Precompiled Header to Not Using Precompiled Headers.
Compile
Time to compile! In the top menu, select
Build -> Batch Build
Select all projects and build. Check the output directories to verify that all DLL’s are ready.
Leave a Comment